|
|
|
Categories
|
|
Information
|
|
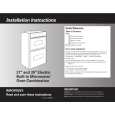
Featured Product
|
|
|
 |
|
|
There are currently no product reviews.
 ;
A comprehensive Operating and Service Manual. All schematics are complete and easy to read. The PCB drawings and complete parts list are very helpful. I would definitely recommend this manual.
;
SCANNING OF HIGH QUALITY
VERY, VERY HIGH VELOCITY DOWNLOAD
VERY GOOD PRICE,
TRUE SATISFIED, THANKS
;
Genuine Toshiba owner's manual. Couldn't really ask for more. And written in understandable English in contrast to a few recent experiences I have had with manuals for other equipment other than Toshiba but made in China and written in "Chinglish"!
;
I purchased a vintage Sony mixer off eBay and within the hour was able to locate and purchase the manual for it.I mean really,where else can you find a manual for a product made in 1983!? It was easy to find and purchase/download the manual I needed.I will use this site again for other equipment I have! Great site!
;
manual de usuario perfecto y completo de buena calidad de impresion y muy detallado ideal !
Door reversal directions
1. Disconnect from the electricity supply. 2. Remove all loose items, including food, store food in a cool place. 3. Gently lay the fridge/freezer on its back with the top held away from the floor by 5-8 cm (2-3 inches) of packing; 4. Remove the feet (2-3) 5. Remove bottom hinge (1). 6. Slide out the lower door from middle hinge (H) and remove the latter. 7. Slide out the upper door from pin (G), unscrew the latter and then screw it down into the hinge provided on the opposite side, after having removed the small plugs which should then be fitted on the opposite side. Unscrew the handle. Refit it on the opposite side after having pierced the plugs with a punch. Cover the holes left open with the plugs contained in the documentation pack. 8. Refit the upper door and the middle hinge on the opposite side. 9. Refit the lower door and bottom hinge (1) on the opposite side. 10.Refit the feet (2-3)
D715
3
1 2
H
G
Attention
After completion of the door reversing operation, check that the door gasket adheres to the cabinet. If the ambient temperature is cold (i.e. in Winter), the gasket may not fit perfectly to the cabinet. In that case, wait for the natural fitting of the gasket or accelerate this process by heating up the part involved with a normal hairdrier.
PR220
19
|
|
|
> |
|